Your product deserves more than flat images.
Think about it. When was the last time a static photo made you say “wow”? Probably never. But a spinning, rotating 3D animation? That catches your eye every time.
3D product animation is changing how businesses sell online. It’s not just for big brands anymore. Small businesses, eCommerce brands, and startups are using it to stand out in crowded markets.
This guide shows you everything. We’ll cover costs, software, DIY options, and how to pick the right partner. You’ll learn why 3D animation boosts sales and builds trust with customers.
Let’s dive in.
What Is 3D Product Animation? (And Why It Matters)
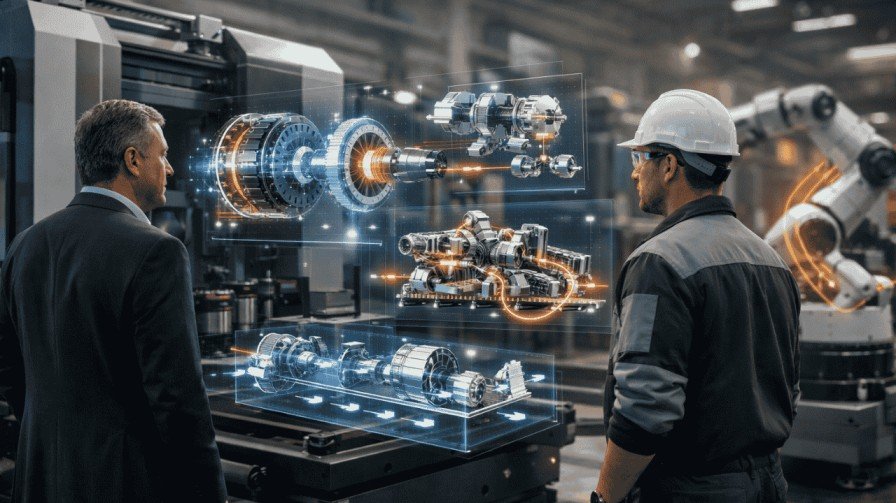
3D product animation brings your products to life on screen.
It’s a digital technique that creates moving visuals of your product. Think of it as a virtual photoshoot. But instead of a camera, you use 3D rendering software.
The result? Your customers see every angle. They watch features in action. They understand your product before buying.
Why Businesses Use 3D Product Animation
Here’s the thing: online shoppers can’t touch your product. They rely on visuals alone.
Static images only show one view. Videos can be expensive to reshoot. But 3D animation? It shows everything without physical limits.
Key benefits:
- Show products that don’t exist yet
- Highlight features that cameras miss
- Create interactive product demos
- Save money on photoshoots
- Update visuals without new shoots
Product visualization techniques have evolved. 3D animation is now the gold standard for high-quality product visuals.
How 3D Product Animation Increases Sales
Let’s talk numbers.
Studies show that product pages with 3D visuals get 40% more engagement. Conversion rates jump by 27% when customers can rotate products.
Why does this work?
The Psychology Behind It
Your brain processes visuals 60,000 times faster than text. When customers see a product move, their brain engages differently.
It’s like window shopping. You stop when something catches your eye. 3D animations create that “stop and look” moment online.
Here’s what happens:
- Customer lands on your page
- Animation catches their attention
- They interact with the 3D model
- Engagement time increases
- They feel confident about features
- Purchase decision happens faster
Real-World Results
eCommerce brands using 3D animation report fewer returns. Customers know exactly what they’re getting. No surprises at delivery.
Think of it as a test drive. Car dealerships let you drive before buying. 3D animation does the same thing online.
You’re reducing buyer hesitation. That’s powerful.
Building Emotional Connection
Static photos are forgettable. Animations stick in memory.
When customers rotate a product, zoom in on details, or watch features in action, they’re investing time. That investment creates connection.
Connection leads to trust. Trust leads to sales. Learn more about the exact sales metrics in our detailed article: How 3D Animation Boosts Your Revenue.
3D Product Animation vs Product Photography: The Ultimate Comparison
Should you ditch photography completely?
Not necessarily. But understanding the differences helps you decide.
The Photography Challenge
Traditional product photography has limits.
You need physical samples. Lighting must be perfect. Each angle needs a new shot. Changes require reshoots.
It’s expensive and time-consuming.
The Animation Advantage
3D rendering for marketing solves these problems.
You create the product digitally once. Then you can:
- Change colors instantly
- Adjust materials without reshoots
- Add or remove features
- Create unlimited angles
- Update designs easily
Comparison Table:
| Feature | Product Photography | 3D Product Animation |
| Setup Time | 2-5 days | 1-3 weeks (initial) |
| Cost per Product | $500-$2,000 | $1,000-$5,000 |
| Flexibility | Limited | Unlimited |
| Changes | Requires reshoot | Quick updates |
| Interactivity | None | Fully interactive |
| Virtual Products | Impossible | Easy |
| Reusability | Single use | Infinite use |
Still deciding between the two? Our in-depth comparison breaks down every detail: 3D Product Animation vs Product Photography: Which Wins?
When Photography Still Wins
Photography works great for:
- Simple products
- Limited budget projects
- Products with unique textures
- Lifestyle shots with models
But for technical products, complex designs, or products still in development? Animation wins every time.
The Hybrid Approach
Smart businesses use both.
Photography for lifestyle content. 3D animation for product features. Together, they create a complete visual story.
Think of it like peanut butter and jelly. Good separately, better together.
Best Software for 3D Product Animation
Ready to create animations yourself? You’ll need the right tools.
The software landscape can be confusing. Let’s break it down.
Professional-Grade Options
Blender
This is the free powerhouse. Yes, free.
Blender handles everything from modeling to animation. It’s open-source and constantly updated. The learning curve is steep, but the results are professional.
Best for: Budget-conscious businesses willing to learn.
Autodesk Maya
Maya is the industry standard for animation studios.
It offers advanced features and incredible control. But it comes with a subscription cost ($235/month).
Best for: Large projects needing maximum flexibility.
Cinema 4D
This is the user-friendly option.
Cinema 4D balances power with ease of use. Motion graphics designers love it. The interface makes sense quickly.
Best for: Businesses wanting faster results.
KeyShot
KeyShot specializes in rendering.
It creates photorealistic images fast. The real-time preview helps you see results instantly.
Best for: Product visualization with minimal animation needs.
Game Engine Options
Unreal Engine
Unreal isn’t just for games anymore.
It creates interactive product demos that customers can control. Real-time rendering means instant feedback.
Best for: Interactive experiences and configurators.
Choosing Your Software
Ask yourself:
- What’s your budget?
- How complex is your product?
- Do you need interactivity?
- What’s your timeline?
Most beginners start with Blender. It’s free and capable. Once you outgrow it, upgrade to paid options.
The Learning Investment
Here’s the truth: all 3D rendering software takes time to learn.
Expect 3-6 months to get comfortable. YouTube tutorials help. Online courses accelerate learning.
But if time is money for you, hiring professionals might be smarter. Compare all options side-by-side in our Best Software for 3D Product Animation guide.
3D Product Animation Cost for Small Businesses
Let’s talk about the elephant in the room: money.
How much does 3D product animation actually cost?
Breaking Down the Numbers
Costs vary wildly. Here’s why:
Factors affecting price:
- Product complexity (simple vs. intricate)
- Animation length (5 seconds vs. 60 seconds)
- Detail level (basic vs. photorealistic)
- Revisions needed
- Timeline urgency
- Provider experience
Typical Price Ranges
DIY Route:
- Software: $0-$300/month
- Learning time: 100-200 hours
- Your time cost: Calculate your hourly rate
Freelancer Hire:
- Simple product: $500-$1,500
- Medium complexity: $1,500-$3,500
- Complex product: $3,500-$8,000
Animation Studio:
- Basic package: $2,000-$5,000
- Professional package: $5,000-$15,000
- Enterprise solution: $15,000+
Planning your budget? Get exact pricing breakdowns in our 3D Product Animation Cost Guide for Small Businesses.
What You’re Actually Paying For
3D animation production workflow includes multiple steps:
- Discovery and planning
- 3D modeling creation
- Texture and material application
- Lighting setup
- Animation choreography
- Rendering (computing time)
- Post-production editing
- Revisions and refinements
Each step takes skill and time.
Budget-Friendly Strategies
Start small. Create animation for your best-selling product first. Test the impact. Then expand.
Reuse assets. Once your product is modeled, creating variations costs less.
Bundle services. Many studios offer discounts for multiple products.
Plan ahead. Rush jobs cost 50% more. Give providers reasonable timelines.
ROI Perspective
Yes, $3,000 sounds expensive. But compare it to:
- Traditional photoshoot: $2,000-$5,000
- Video production: $5,000-$20,000
- Lost sales from poor visuals: Priceless
If animation increases conversions by just 10%, it pays for itself quickly.
Think investment, not expense.
How to Create 3D Product Animation: Step-by-Step Guide
Want to create animations yourself? Here’s the roadmap. Following this guide? Get our downloadable checklist: Complete 3D Animation Creation Workflow.
Step 1: Gather Reference Materials
You need detailed product information:
- CAD files (if available)
- Product photos from all angles
- Dimension specifications
- Material details
- Color references
Think of this as your blueprint. The more detail, the better your result.
Step 2: Choose Your Software
Based on our earlier discussion, pick your tool. Blender works great for beginners.
Download it. Install it. Prepare for a learning curve.
Step 3: Create the 3D Model
This is the foundation.
You’ll build your product from scratch using basic shapes. It’s like digital sculpting.
Key techniques:
- Start with primitive shapes
- Add details gradually
- Focus on accuracy over speed
- Use reference images constantly
This step takes the longest. Be patient.
Step 4: Apply Materials and Textures
Your model needs realistic surfaces.
Is it metal? Plastic? Glass? Each material reflects light differently.
Material properties to consider:
- Color and finish
- Reflectivity
- Roughness or smoothness
- Transparency
- Surface imperfections
High-quality product visuals depend on realistic materials.
Step 5: Set Up Lighting
Lighting makes or breaks your animation.
Bad lighting = amateur results. Good lighting = professional look.
Use three-point lighting as your starting point:
- Key light (main illumination)
- Fill light (reduces shadows)
- Back light (separates from background)
Experiment until it looks right.
Step 6: Create the Animation
Now your product moves.
Simple rotations work well. The classic 360-degree spin never gets old.
Animation options:
- Full rotation
- Feature highlights
- Exploded views
- Assembly sequences
- Use demonstrations
Keep it smooth. Natural movement looks better than jerky motion.
Step 7: Render Your Animation
Rendering converts your 3D scene into video.
This step is computing-intensive. It might take hours or days depending on:
- Animation length
- Quality settings
- Computer power
- Complexity
Be patient. Good rendering can’t be rushed.
Step 8: Post-Production Polish
Add final touches:
- Color correction
- Background music
- Text overlays
- Brand elements
- Compression for web
Use simple video editing software for this step.
Reality Check
This process takes weeks to learn. Months to master.
Your first animation won’t be perfect. That’s okay. Everyone starts somewhere.
DIY vs Professional 3D Animation: Making the Right Choice
Should you do it yourself or hire experts?
This decision affects your budget, timeline, and results.
The DIY Approach
Pros:
- Lower upfront costs
- Complete creative control
- Learn valuable skills
- No communication delays
- Flexibility to experiment
Cons:
- Steep learning curve
- Time-consuming process
- Limited technical knowledge
- Amateur-looking results initially
- Hidden costs (software, hardware)
Problems with DIY 3D Animations
Let’s be honest about common issues:
1. Time Investment
Creating professional animations takes hundreds of hours. Can your business afford that?
2. Technical Limitations
Your computer might not handle complex rendering. Crashes and slowdowns frustrate progress.
3. Quality Gap
Your first ten animations will look amateur. Customers notice quality differences instantly.
4. Outdated Knowledge
Software updates constantly. Keeping skills current requires ongoing learning.
5. No Feedback Loop
Professionals have teams reviewing work. You’re working alone. Mistakes go unnoticed.
6. Rendering Challenges
Rendering complex scenes can take days on consumer computers. Animation studios use render farms.
The Professional Route
Pros:
- Expert-level results
- Faster turnaround
- Professional equipment
- Experience with best practices
- Revision support
- Consistent quality
Cons:
- Higher initial investment
- Less direct control
- Communication required
- Finding the right partner takes time
The Hybrid Solution
Here’s a smart approach:
Start with professionals for your hero products. Learn DIY skills for simple updates and variations.
This gives you professional quality where it matters. Plus you build internal capability over time.
Decision Framework
Choose DIY if:
- You have 6+ months to learn
- Budget is extremely tight
- You enjoy technical challenges
- Product changes frequently
- You need basic animations only
Choose professionals if:
- You need results within weeks
- Quality directly impacts sales
- Your product is complex
- Time is more valuable than money
- You want consistent output
Most successful businesses eventually hire professionals. The ROI justifies the investment. Need help deciding? Use our DIY vs Professional Comparison Tool.
How to Choose a 3D Product Animation Service Provider
Ready to hire? Great choice. Now let’s find the right partner.
Choosing poorly wastes money and time. Choosing well transforms your business.
What to Look for First
Portfolio Quality
This is non-negotiable. Review their previous work carefully.
Ask yourself:
- Do animations look realistic?
- Is movement smooth and natural?
- Do they match your industry?
- Can they handle your product type?
If their portfolio doesn’t impress you, move on.
Industry Experience
Some studios specialize in specific industries. eCommerce brands need different expertise than medical device companies.
Find providers who understand your market. They’ll grasp requirements faster.
Communication Style
You’ll work together for weeks. Clear communication prevents problems.
During initial calls, notice:
- Do they ask good questions?
- Do they explain technical terms clearly?
- Do they respond promptly?
- Do they seem interested in your goals?
Poor communication = project disasters.
Key Questions to Ask
1. What’s your typical animation production timeline?
Realistic timelines prevent disappointment. Rushed work shows in quality.
2. How many revision rounds are included?
Unlimited revisions sound great but often mean unclear processes. 2-3 rounds is standard.
3. What file formats do you deliver?
You need formats compatible with your website and marketing platforms.
4. Can I see examples similar to my product?
Similar projects indicate relevant experience.
5. What’s included in your quoted price?
Hidden costs hurt. Get everything in writing.
6. Who owns the final files?
Some studios retain ownership. This limits your future use. Clarify upfront.
7. What if I need updates later?
Product changes happen. Understand their update process and costs.
Ready to find your perfect partner? Follow our complete provider selection guide.
Red Flags to Avoid
Unrealistic promises: “We’ll deliver in 3 days!” probably means low quality.
No contract: Professional studios always use contracts protecting both parties.
Poor reviews: Check Google, Clutch, and industry forums.
Pressure tactics: “Sign today for discount!” suggests desperation.
Vague pricing: Legitimate studios provide detailed quotes.
No revision policy: Changes always happen. Rigid policies create conflicts.
Comparing Proposals
Get quotes from 3-5 providers. Compare:
- Total cost
- Timeline
- Deliverables included
- Revision policy
- Communication process
- Payment terms
Cheapest isn’t always best. Most expensive isn’t either.
Look for value: quality results at fair prices.
Making Your Final Decision
Trust your gut, but verify with facts.
The right animation studio feels like a partner, not a vendor. They care about your success, not just the project.
Choose providers who:
- Understand your business goals
- Communicate clearly and regularly
- Show genuine interest in quality
- Provide realistic expectations
- Have satisfied previous clients
This relationship impacts your brand image. Choose wisely.
Understanding the Animation Production Timeline
“How long will this take?”
Great question. Let’s break down realistic timelines.
Typical Project Phases
Week 1: Discovery and Planning
The studio learns about your product. You discuss goals, style, and technical requirements.
Deliverables:
- Project scope document
- Style references
- Timeline confirmation
- Contract signing
Weeks 2-3: 3D Modeling
Artists create your product digitally. This is the foundation for everything else.
Expect one review round. You’ll approve the model before moving forward.
Week 4: Texturing and Materials
Your model gets realistic surfaces. Colors, finishes, and details are added.
Another review happens here. Materials significantly affect final appearance.
Week 5: Animation Creation
Motion is added. Your product rotates, features highlight, or actions demonstrate.
This phase shows you rough animation for approval.
Week 6: Lighting and Rendering
Professional lighting is set. Rendering begins. This creates final video frames.
Rendering is computing-intensive. Complex animations take days to render.
Week 7: Post-Production
Final polish happens. Color correction, effects, and editing complete your animation.
You review the near-final version.
Week 8: Revisions and Delivery
Final tweaks are made. You receive all files in agreed formats.
What Affects Timeline
Product Complexity: Simple products take 4-6 weeks. Complex products need 8-12 weeks.
Revision Rounds: Each round adds 3-5 days.
Client Response Time: Slow approvals delay everything. Respond to review requests quickly.
Technical Challenges: Unexpected issues sometimes arise. Buffer time helps.
Studio Workload: Busy seasons might extend timelines.
Planning a project? See realistic timelines for different product types: Animation Production Timeline Examples.
Rushing the Process
Can timelines be shortened?
Yes, but quality suffers or costs increase.
Rush fees (30-50% extra) compensate for overtime and prioritization. Even with rush fees, some steps can’t be compressed.
Rendering takes as long as it takes. Physics don’t care about deadlines.
Planning Your Project
Best practice timeline:
Start projects 10-12 weeks before you need final animations. This allows for:
- Normal production schedule
- Adequate review time
- Buffer for unexpected issues
- No rush fees
Planning ahead saves money and stress.
Communication During Production
Good studios provide regular updates:
- Weekly progress reports
- Scheduled review sessions
- Quick responses to questions
- Proactive problem-solving
You shouldn’t wonder what’s happening. Transparency builds trust.
How 3D Animation Builds Customer Trust
Trust is currency in eCommerce.
Without it, visitors don’t become customers. 3D animation builds trust in surprising ways.
Transparency Through Visualization
When customers see every angle of your product, suspicion decreases.
It’s like holding the product in their hands. They’re not guessing about hidden flaws or missing features.
What customers think:
“If they’re showing me everything, they’re not hiding anything.”
That thought is powerful.
Reducing Purchase Anxiety
Online shopping has a fundamental problem: uncertainty.
Will it look like the photo? Is it the right size? Will it work as described?
3D animation answers these questions visually. Interactive product demos let customers explore features themselves.
Exploration creates confidence. Confidence enables purchase decisions.
Professional Image Projection
High-quality product visuals signal professionalism.
Think about it from the customer’s perspective. Two products, same price:
- Product A: Blurry photos, single angle
- Product B: Smooth 3D animation, every detail visible
Which company seems more trustworthy?
Quality visuals suggest quality products. It’s psychological, but it works.
Setting Accurate Expectations
Here’s an underrated benefit: 3D animation can show exactly what customers will receive.
No surprises at delivery means:
- Fewer returns
- Better reviews
- Repeat customers
- Lower support costs
Returns are expensive. They hurt profit margins and customer satisfaction. Discover the psychology behind it: How 3D Animation Builds Customer Trust (+ Case Studies).
Accurate visualization solves this problem before it starts.
The Technical Credibility Factor
For complex or technical products, animation demonstrates understanding.
When you show how components fit together or how features work, customers think:
“These people know their product inside out.”
That expertise builds trust.
Social Proof Through Quality
Customers compare your visuals to competitors. Better visuals suggest better products.
Fair or not, people judge books by covers. They judge products by presentations.
Investing in product visualization techniques communicates that you care about customer experience.
That care translates to trust.
Frequently Asked Questions (FAQs)
Q1: How much does 3D product animation cost for a single product?
Costs range from $500 to $8,000 depending on complexity. Simple products with basic animation cost $500-$1,500. Medium complexity products run $1,500-$3,500. Highly detailed products with complex animations cost $3,500-$8,000 or more. DIY options reduce costs but require significant time investment.
Q2: Can I create 3D product animations without experience?
Yes, but expect a steep learning curve. Software like Blender is free and powerful. You’ll need 3-6 months to learn basics and 100+ hours for your first project. Many businesses find hiring professionals more cost-effective when factoring in time value and quality differences.
Q3: How long does it take to create a 3D product animation?
Professional studios typically need 4-8 weeks for standard products. Simple animations might finish in 3-4 weeks. Complex products requiring detailed modeling, intricate animation, and multiple revisions can take 8-12 weeks. Timeline depends on product complexity, revision rounds, and how quickly you approve stages.
Q4: What’s better for eCommerce: 3D animation or product photography?
Both have strengths. Photography works well for simple products and lifestyle shots. 3D animation excels at showing complex features, multiple angles, and interactive experiences. The best approach often combines both: photography for lifestyle content and 3D animation for product features and specifications.
Q5: Do I need special software to view 3D product animations on my website?
No. Modern 3D animations are delivered as standard video files (MP4, WebM) that play on any device. Interactive 3D viewers use WebGL technology built into modern browsers. Customers don’t need plugins or special software. Animations work on desktop, mobile, and tablet devices automatically.
Ready to Transform Your Product Presentations?
3D product animation isn’t just a trend. It’s becoming the standard for online selling.
Your competitors are already using it. Customers expect it. The technology is more accessible than ever.
You’ve learned:
- Why 3D animation increases sales and builds trust
- How it compares to traditional photography
- What software options exist
- Real cost expectations
- DIY versus professional considerations
- How to choose the right provider
- What timeline to expect
Now it’s decision time.
Your next steps:
- Identify your top-selling or most complex product
- Research 3D animation providers or software
- Request quotes or start learning
- Create your first animation
- Measure the impact on conversions
- Expand to more products
Don’t let analysis paralysis stop you. Start small. Test one product. Measure results.
The businesses winning online aren’t waiting. They’re showing products in ways that static images never could.
Your products deserve better presentation. Your customers deserve clear, engaging visuals. Your business deserves the competitive advantage.
Ready to get started? Whether you choose DIY or professional product animation services, the important thing is taking that first step. Your future customers are waiting to see what you’ll create.
Transform your product presentations today. The ROI will speak for itself.